Forms
To create a Form Field in a PDF:
PDF Pro offers several tools to help you create forms. The tools include a Text Field, Drop-Down, List, Check Box, Radio Button, and a Regular Button. Let’s take a closer look at some of these options.
First, we have the Default Settings that apply to all forms.
Form Default Settings
1) Open FORMS Tab
2) To change or view the default form settings, select the Form Settings menu choice.
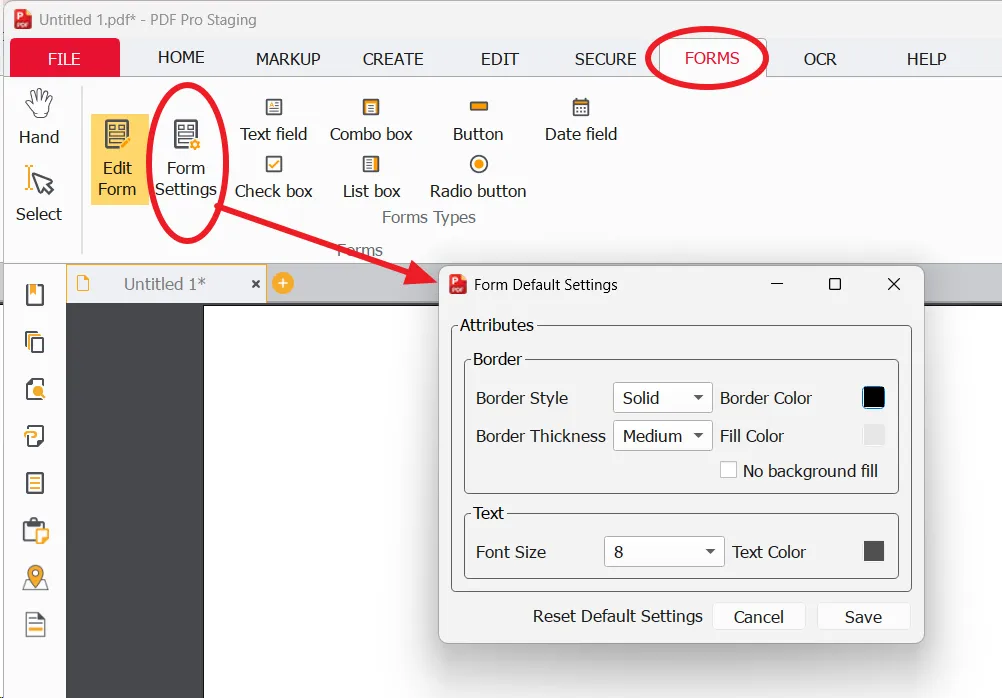
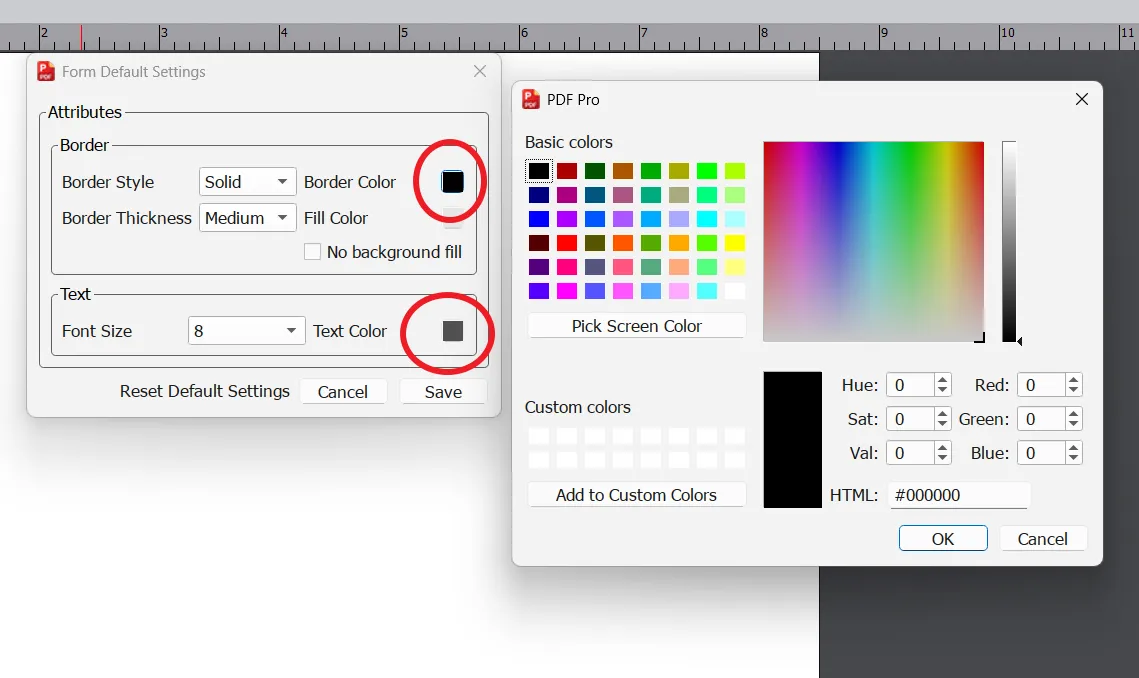
Here you can change the Attributes for the following settings: Border Style, Thickness and Color, Fill Color, Background Fill, Font Size and Color or Reset Default settings.
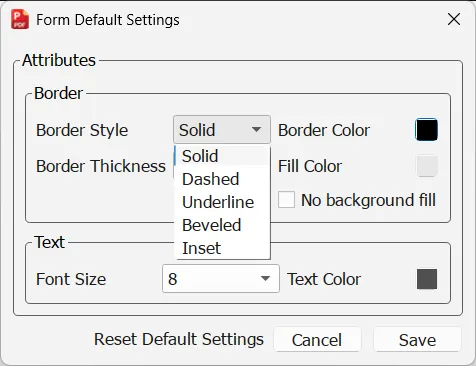
Example of the options available for the Border Style
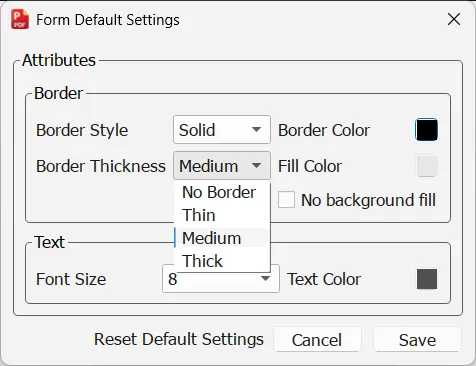
Example of the options available for the Border Thickness
Example of the options available for the Border and Text Color
The TEXT FIELD
Open FORMS Tab
To create a new form element, click on the form function you want to use. For this example we will use the Text Field.
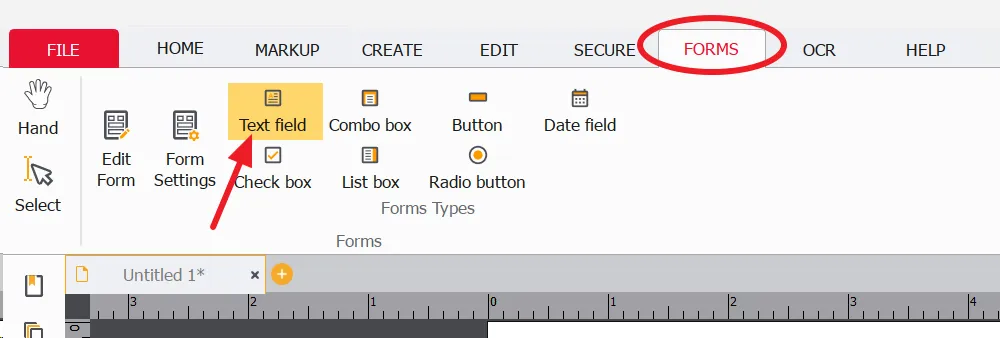
Click and drag to place the Text Field where you want it in the PDF document.
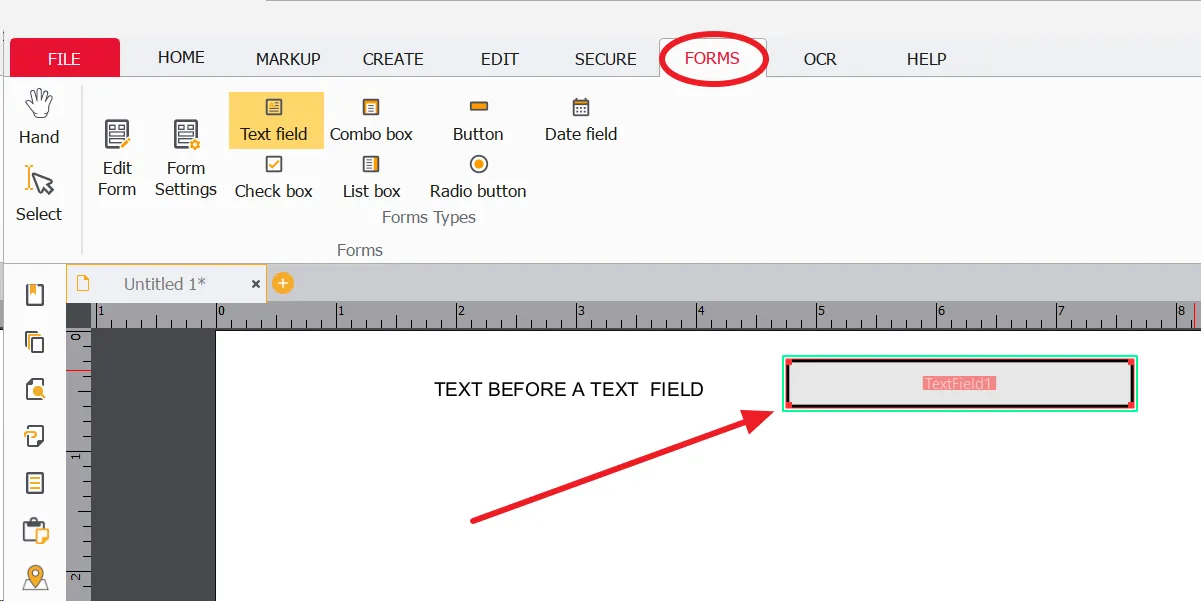
Double click the Text field to access the Text Field's settings
The General Settings
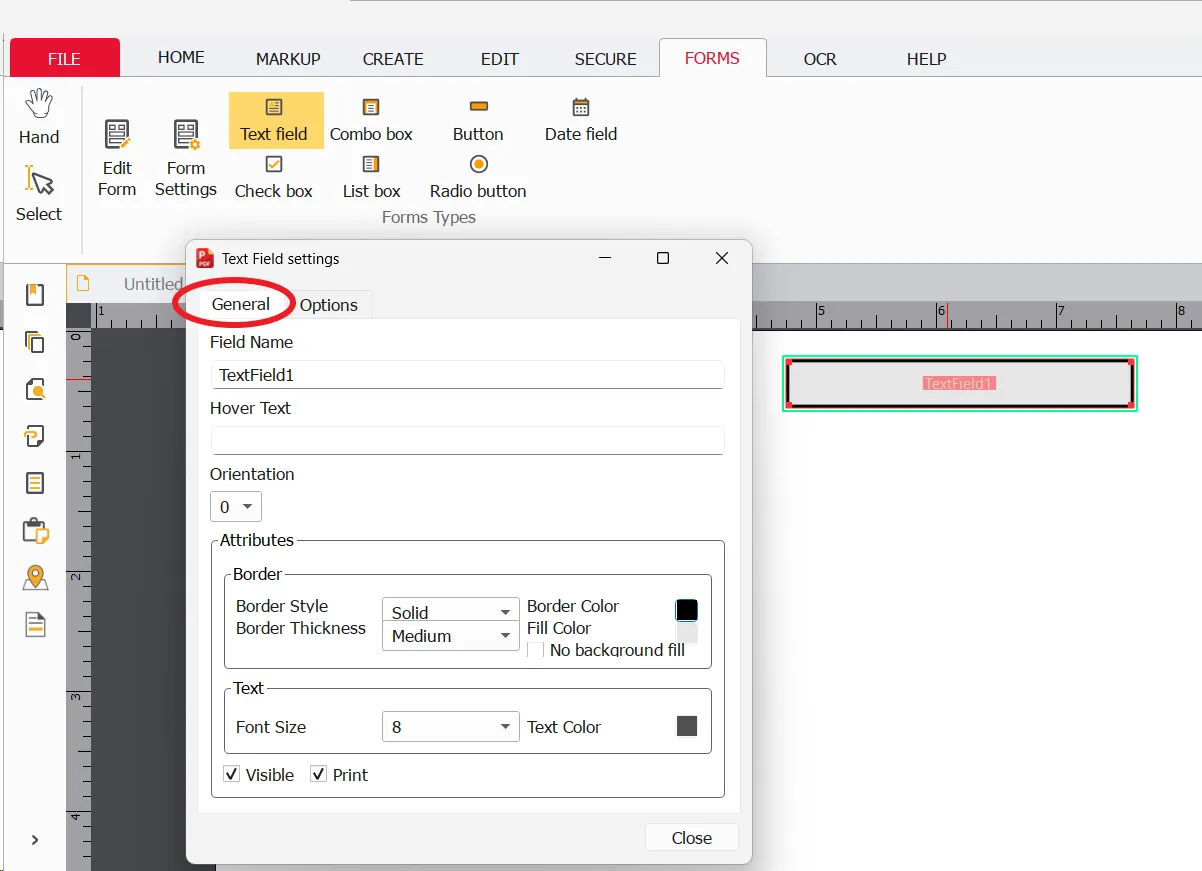
The Options Settings
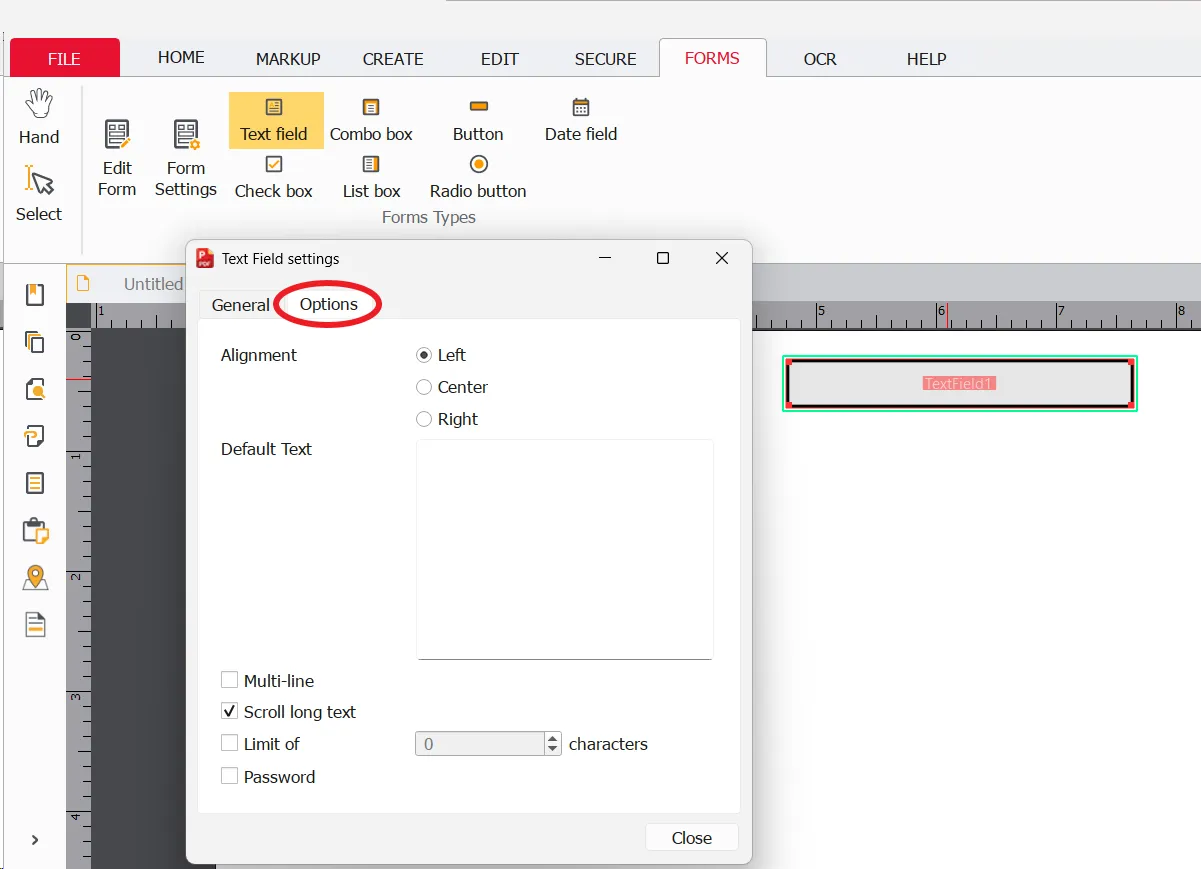
Once you have applied all the required settings, SAVE the file.
To confirm the changes, close the document and then reopen it for viewing.
The opened file will now alert the user that the file has Fillable Form Fields
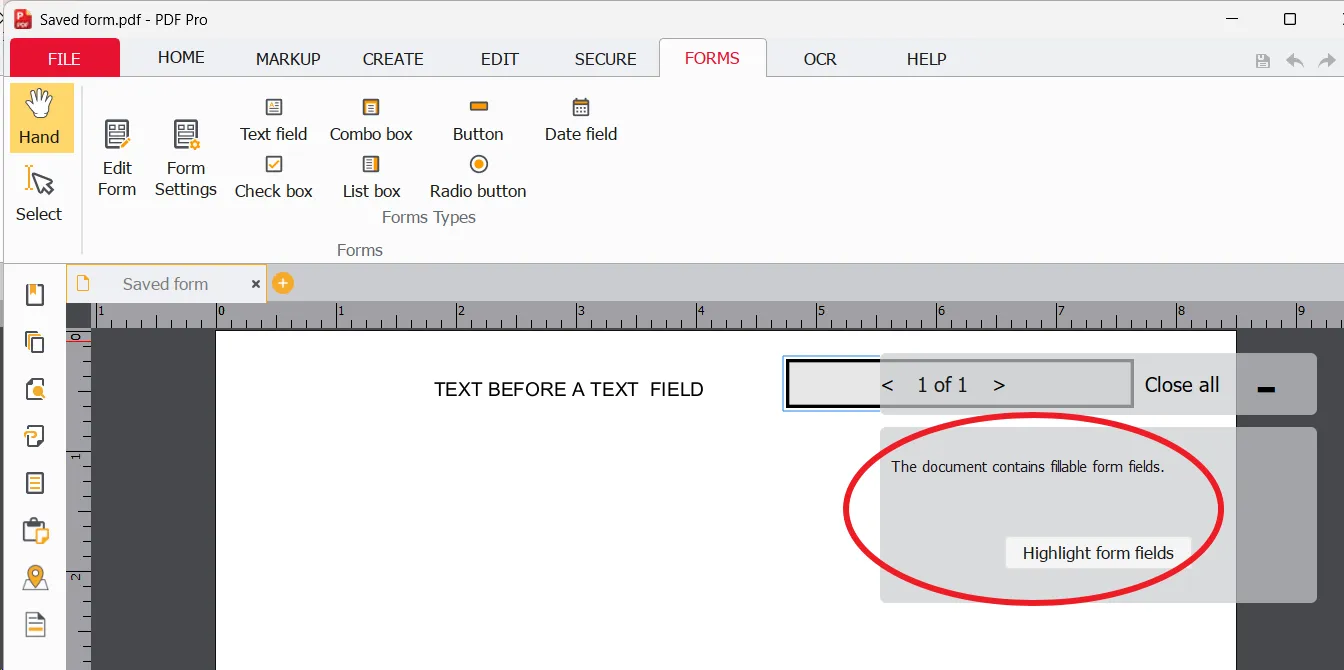
Highlight Form Fields
Select Highlight Form Fields to make the form fields visible in the document.
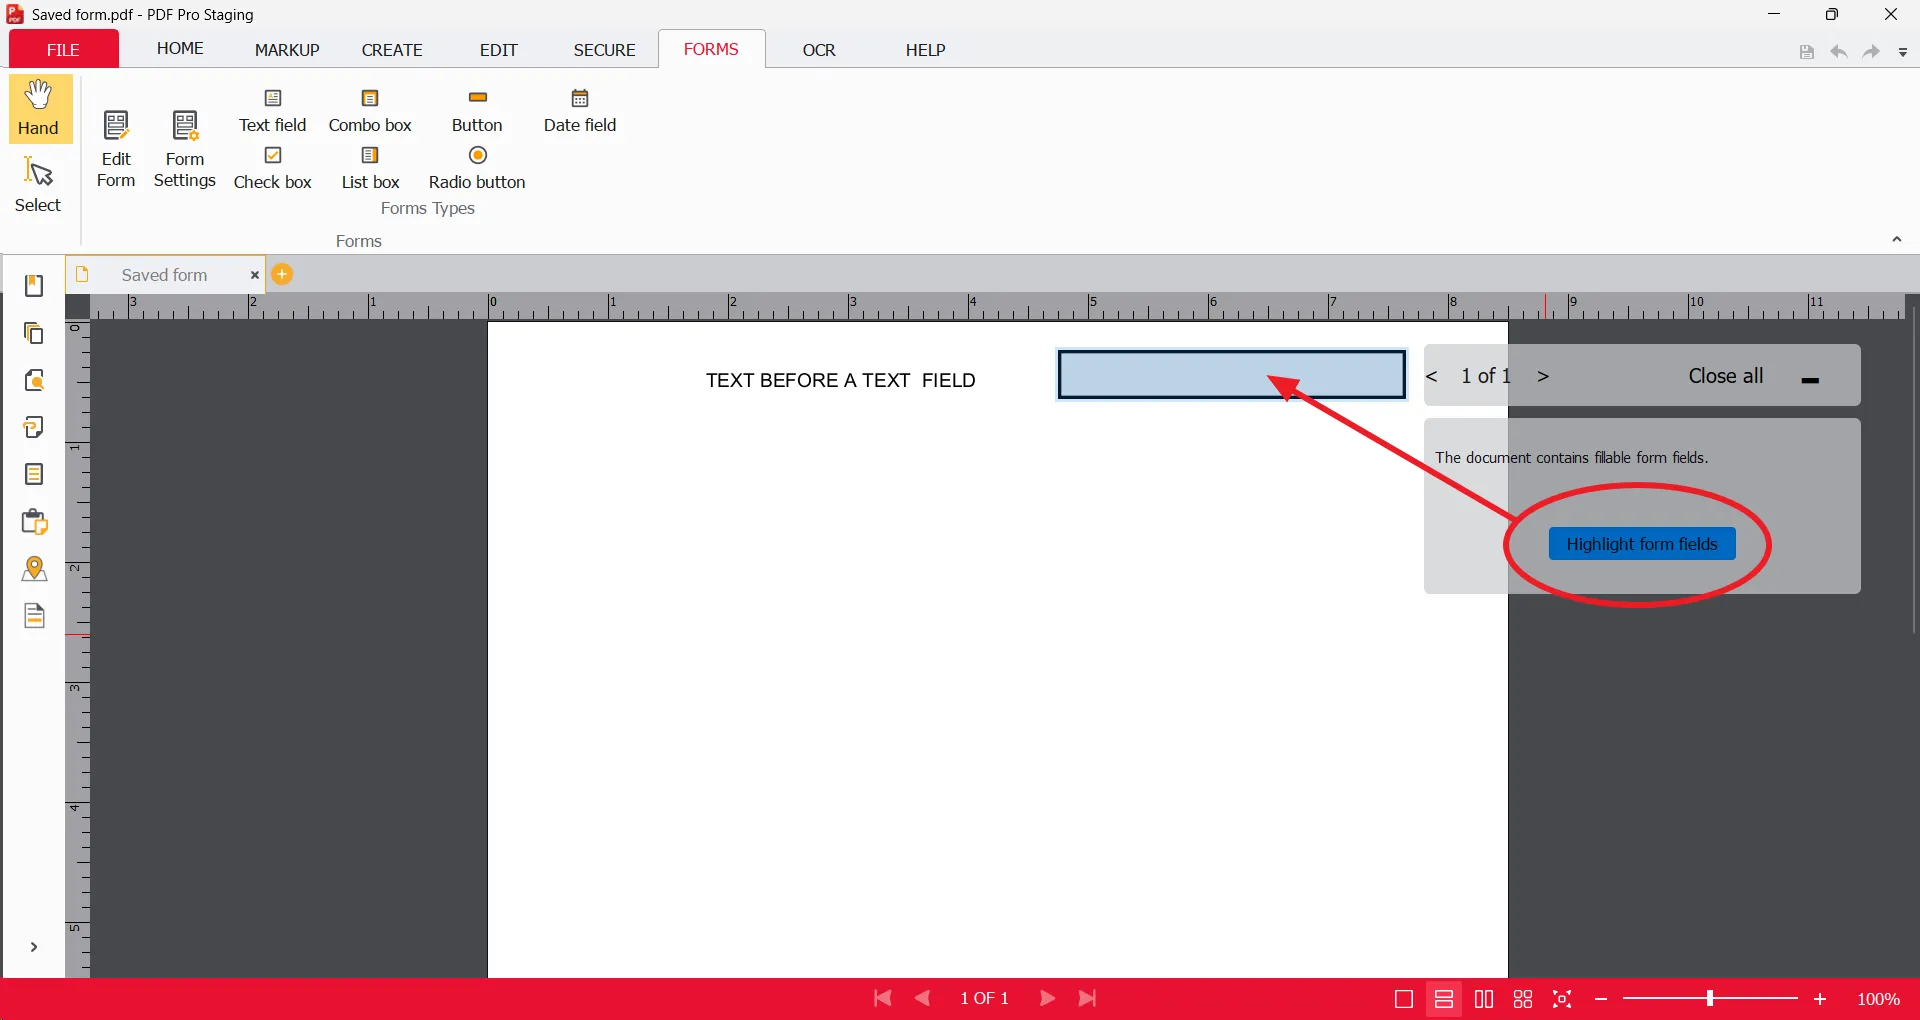
Field Font Size
To test the contents of the field ( Font size for example), enter text into the field.
In this example the original settings for the text box is too small.
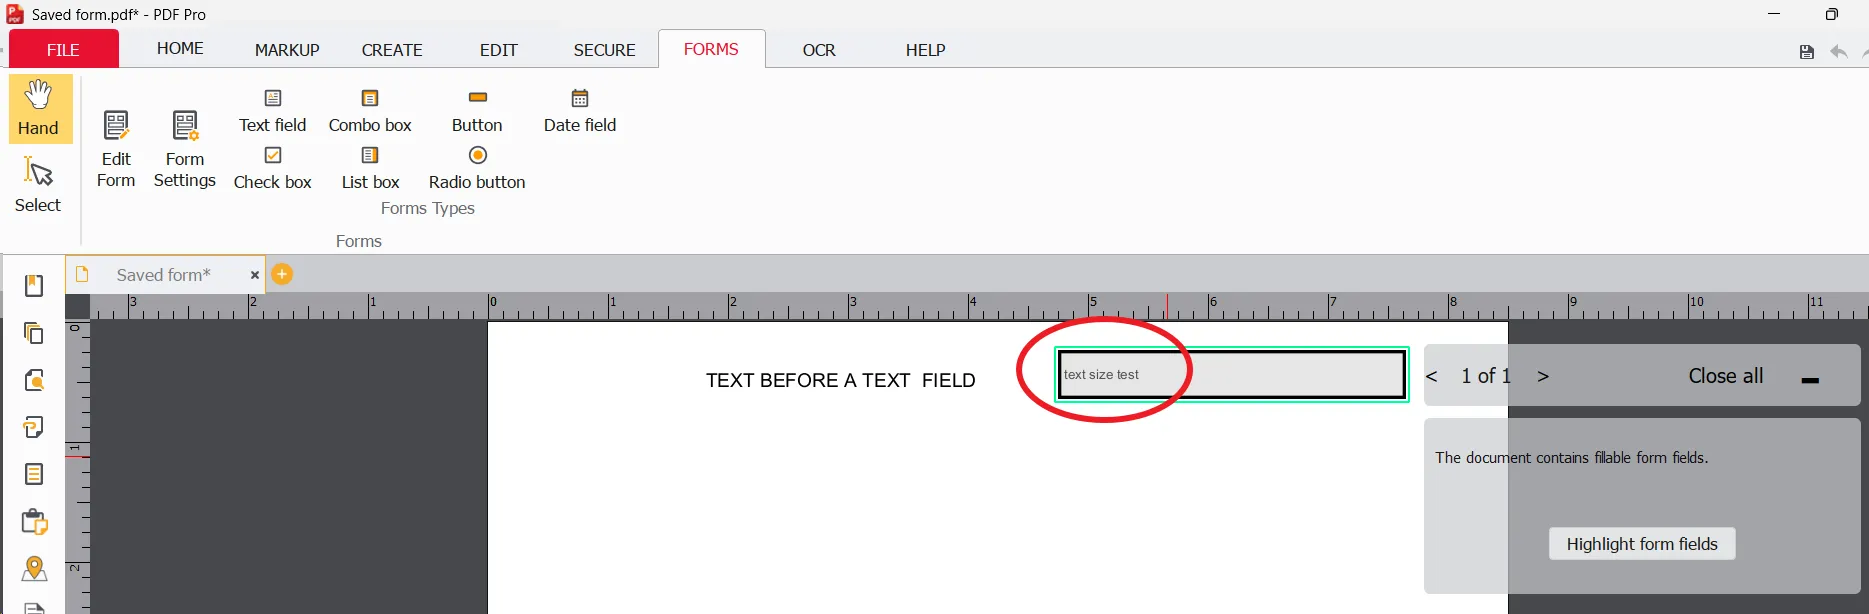
To EDIT the Font Size, first select the text field to be edited and then under FORMS select the menu choice - EDIT FORM
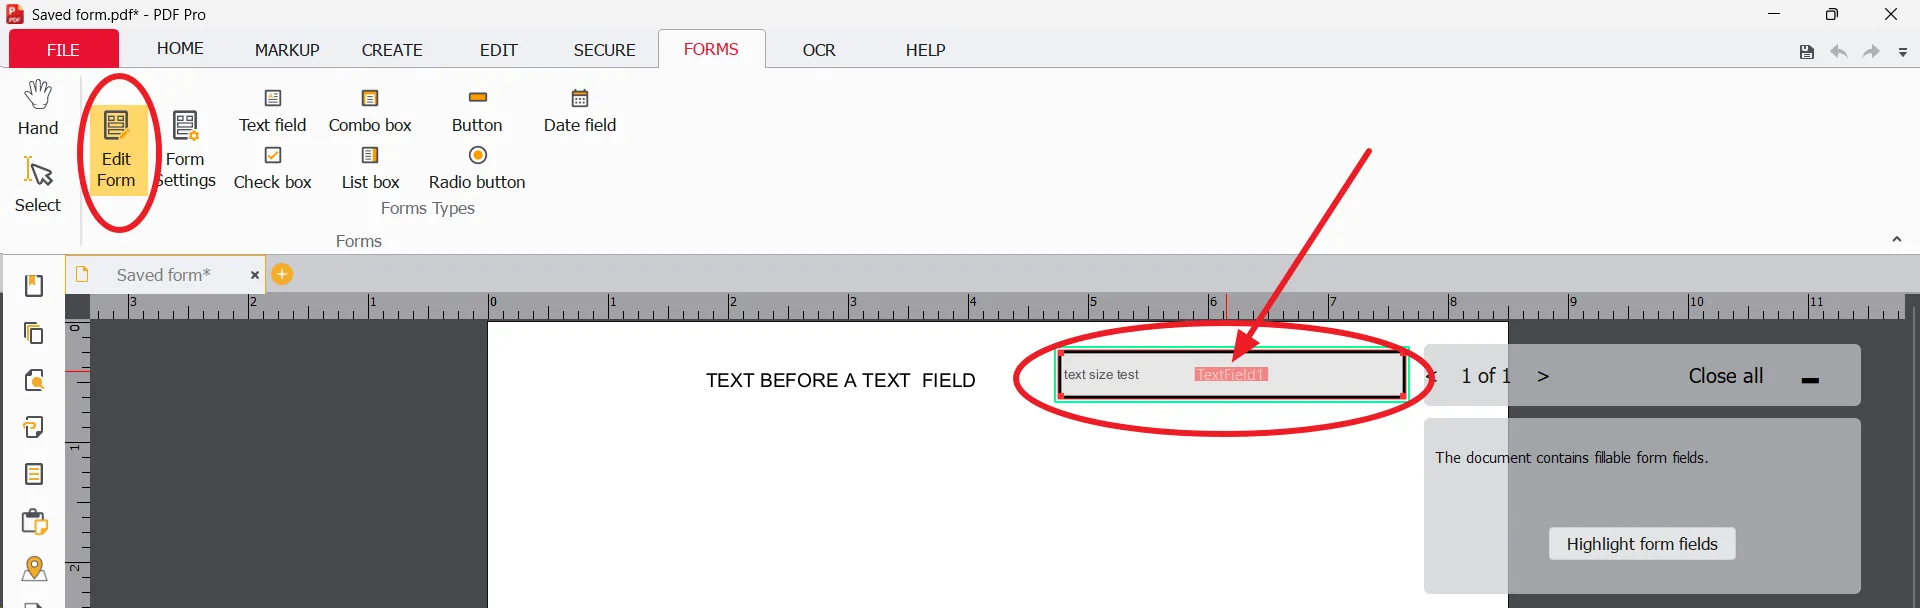
Double click the text box to open the Text Field's settings.
Select the Font SIze pulldown options and select the size required.
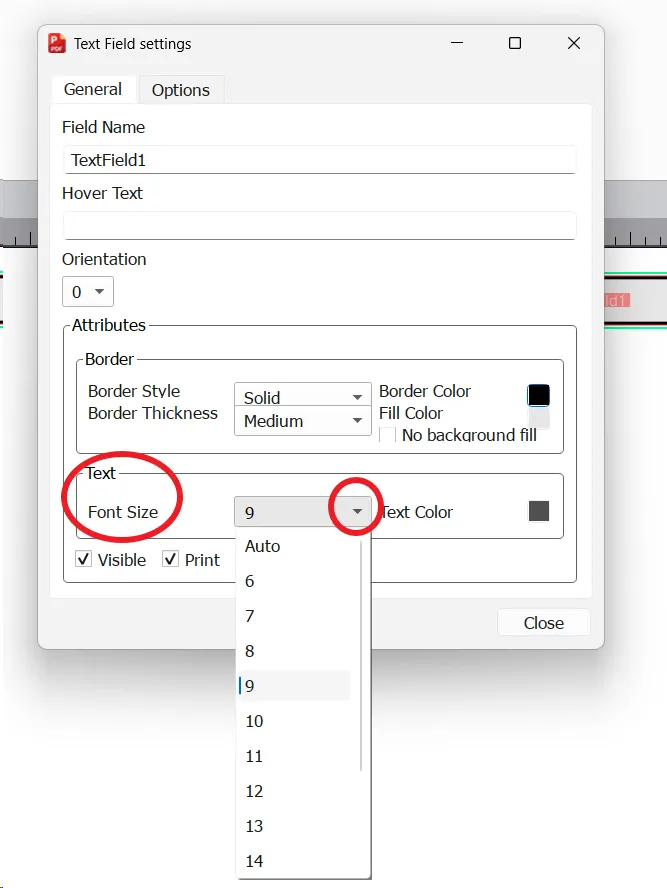
Close the settings box and SAVE the file.
To confirm the changes, close the document and then reopen it for viewing.
Multi-Line option (Wrap feature)
If you need more lines in a text box because the text entered is too long - (Wrap feature).
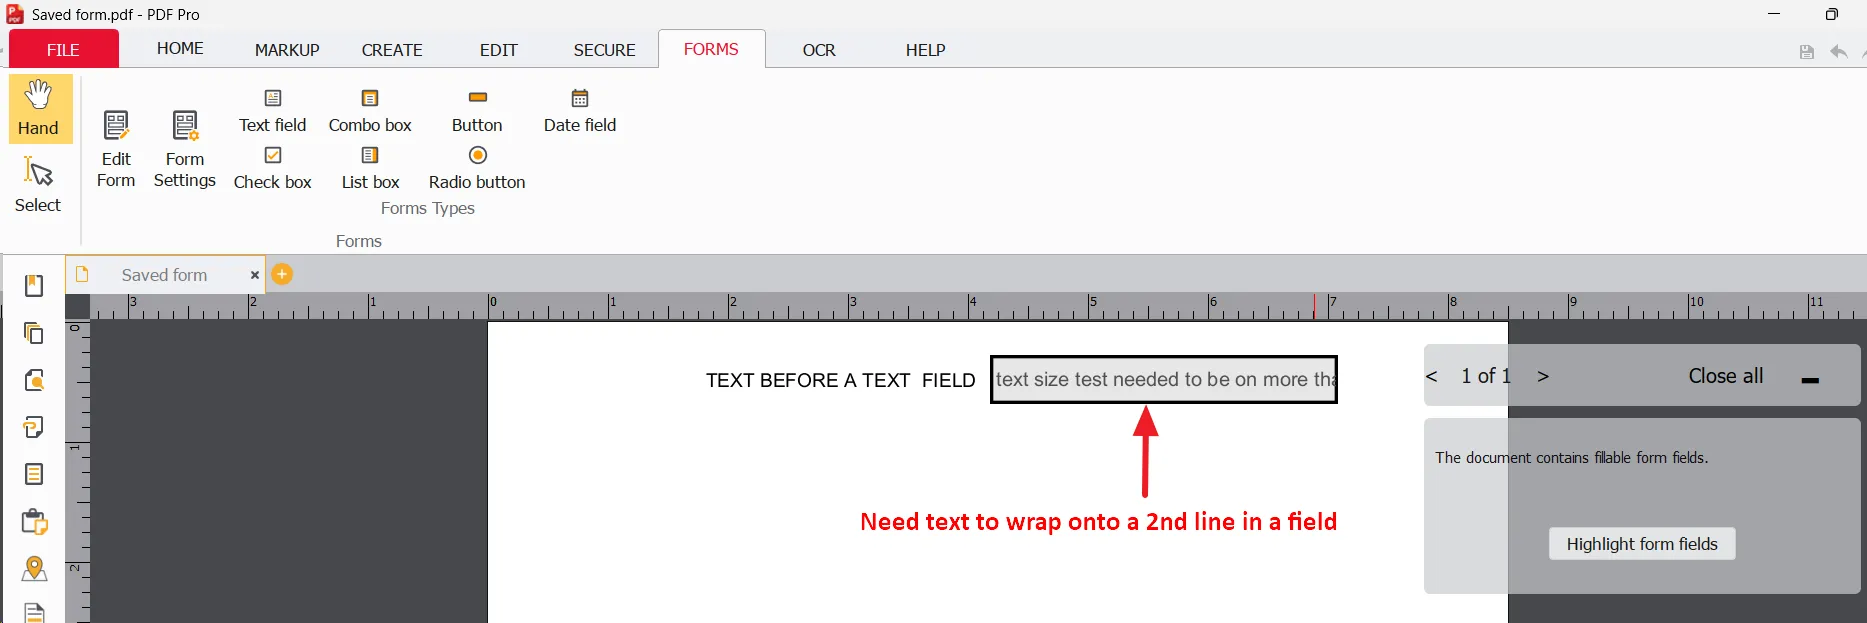
With Edit Form Menu choice selected, double click the text field to open the Text Field's settings.
Select the Options Menu choice and check the box next to Multi-Line. This will enable the wrap feature.
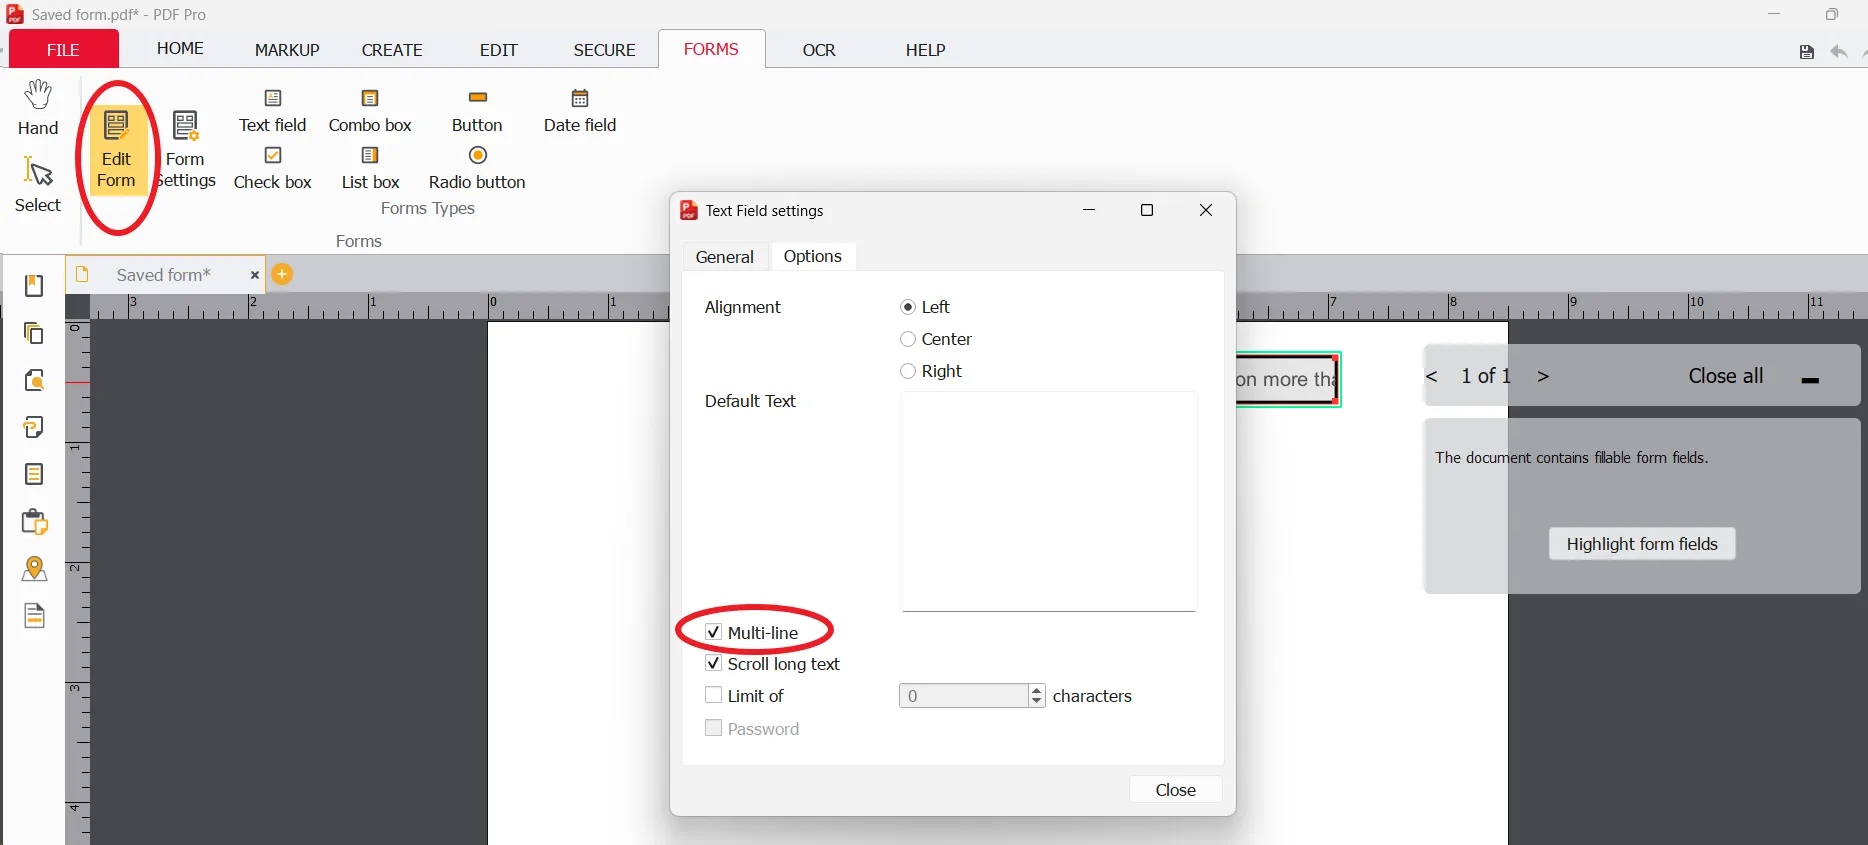
Close the settings box. If the text is too tight in the text field box, you can expand the box size by dragging the corners as shown below.
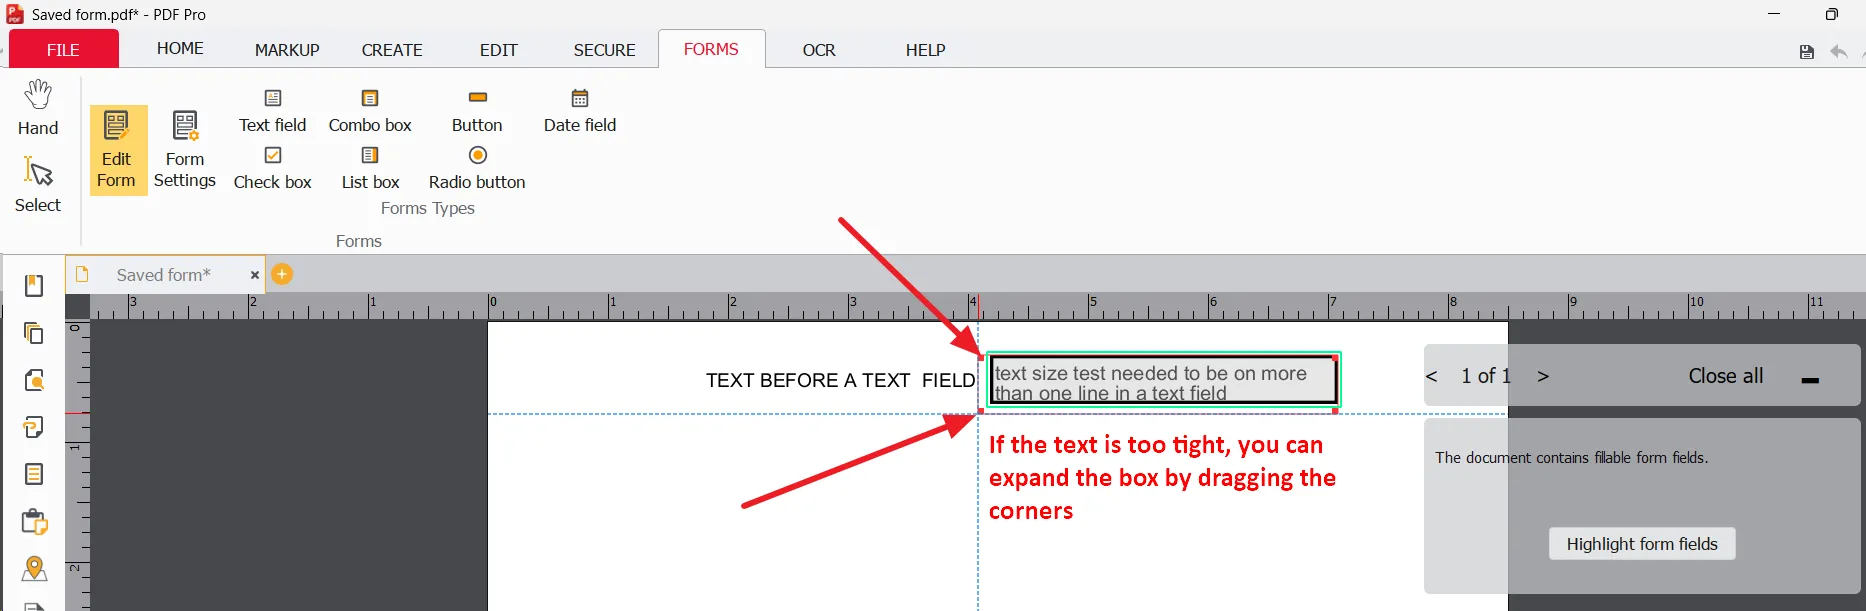
SAVE the file. To confirm the changes, close the document and then reopen it for viewing.
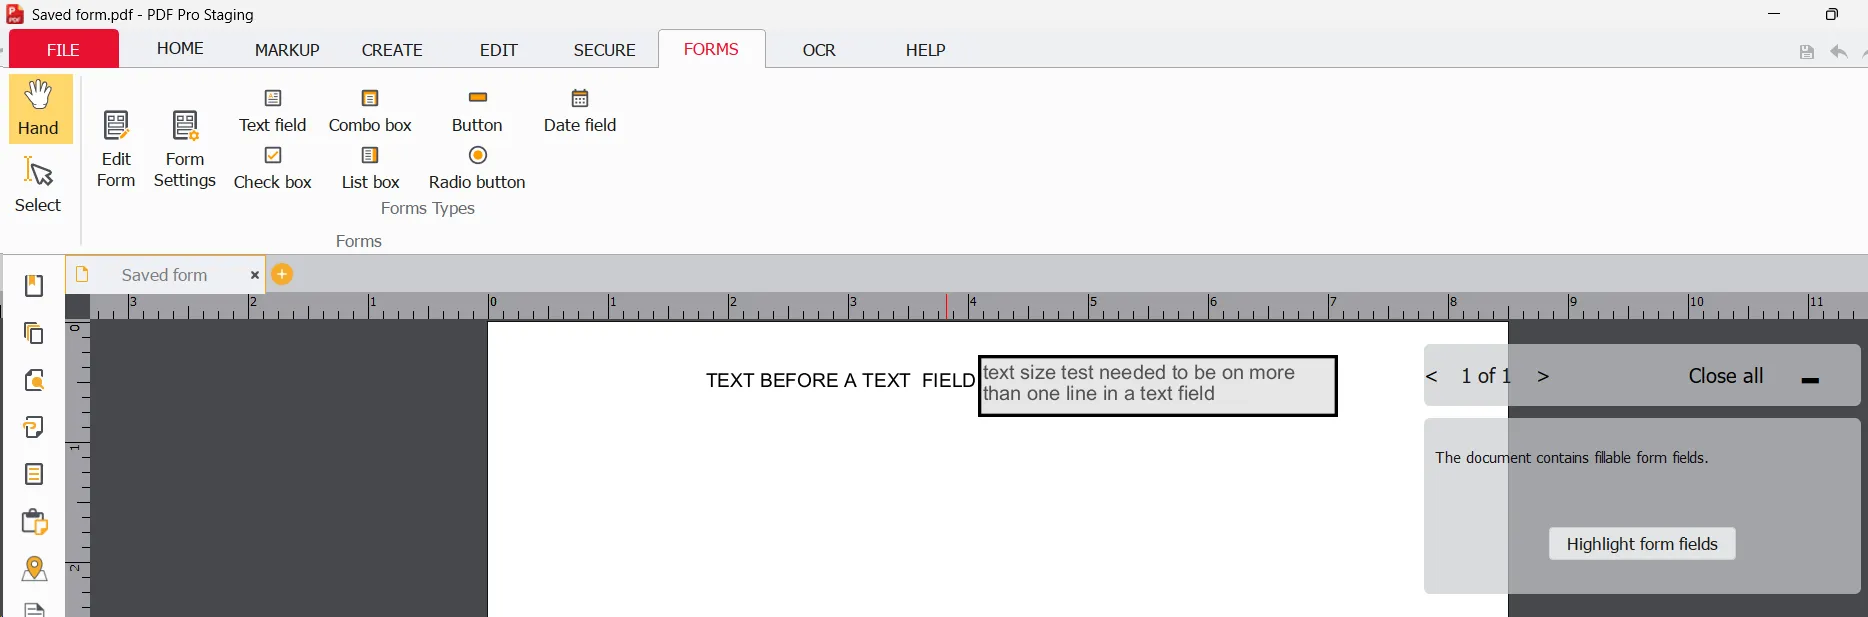
Form Field Text Instructions
You can add text instructions in the field so the user can see what is required when they open the file.
Select the text field to be edited and then under FORMS select the menu choice - EDIT FORM
Double click the text box to open the TextBox's Settings.
Select the Options Menu choice and locate the area next to the words Default Text as shown below.
Write the wording you require to be displayed. You can also select the Alignment of the text within the text box field.
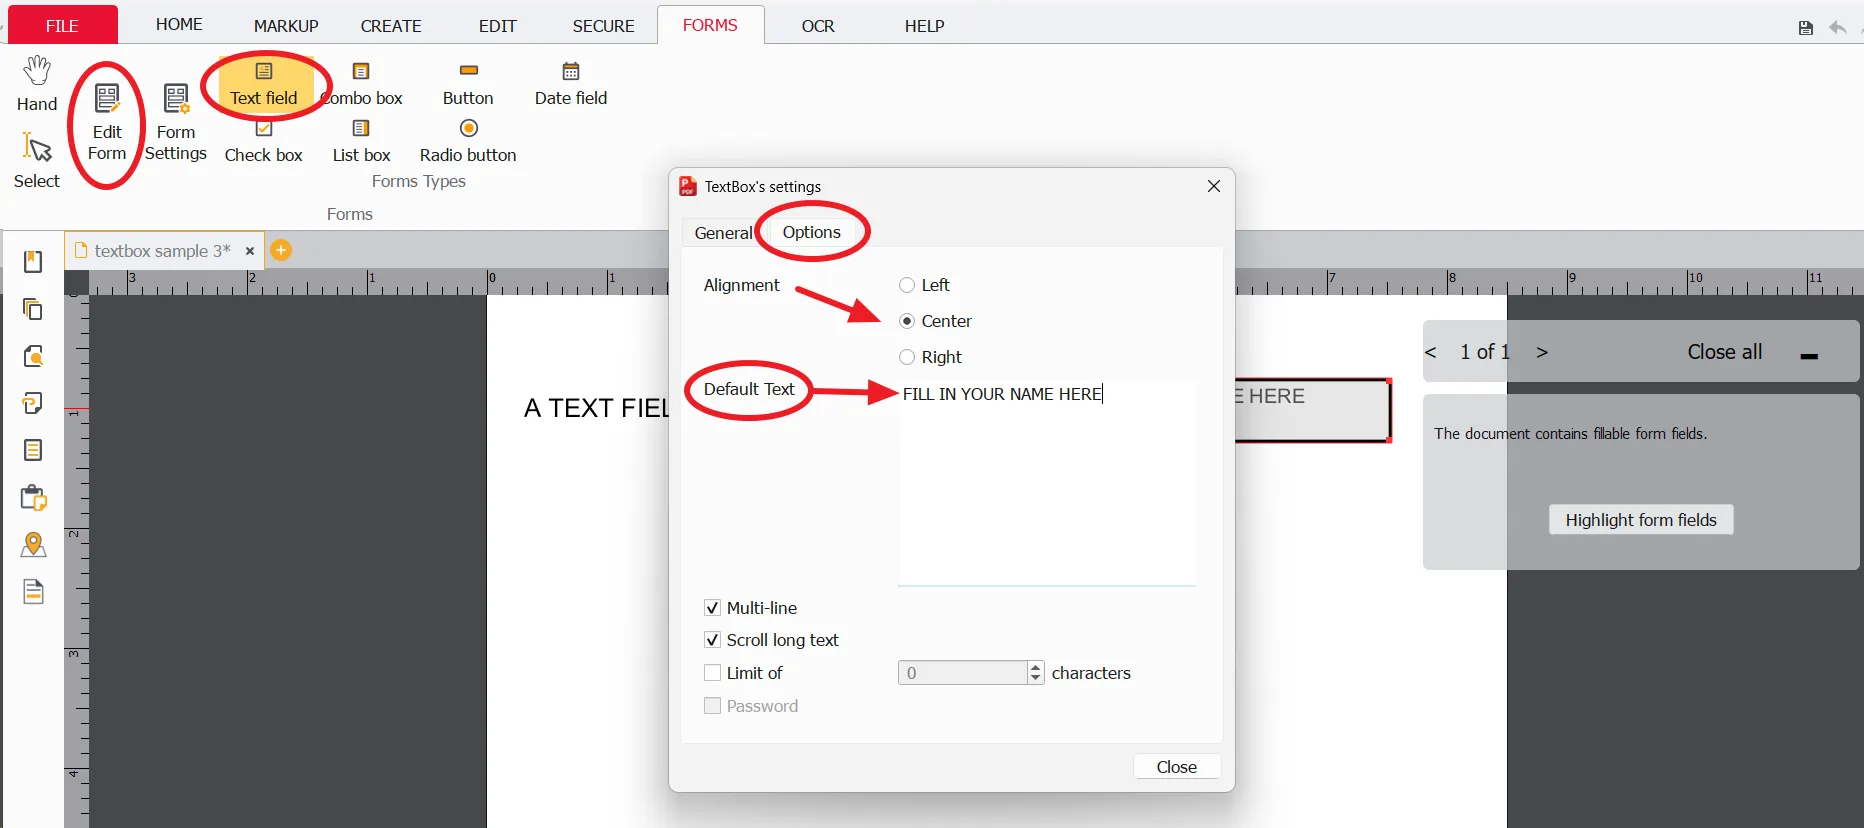
SAVE the file. To confirm the changes, close the document and then reopen it for viewing.
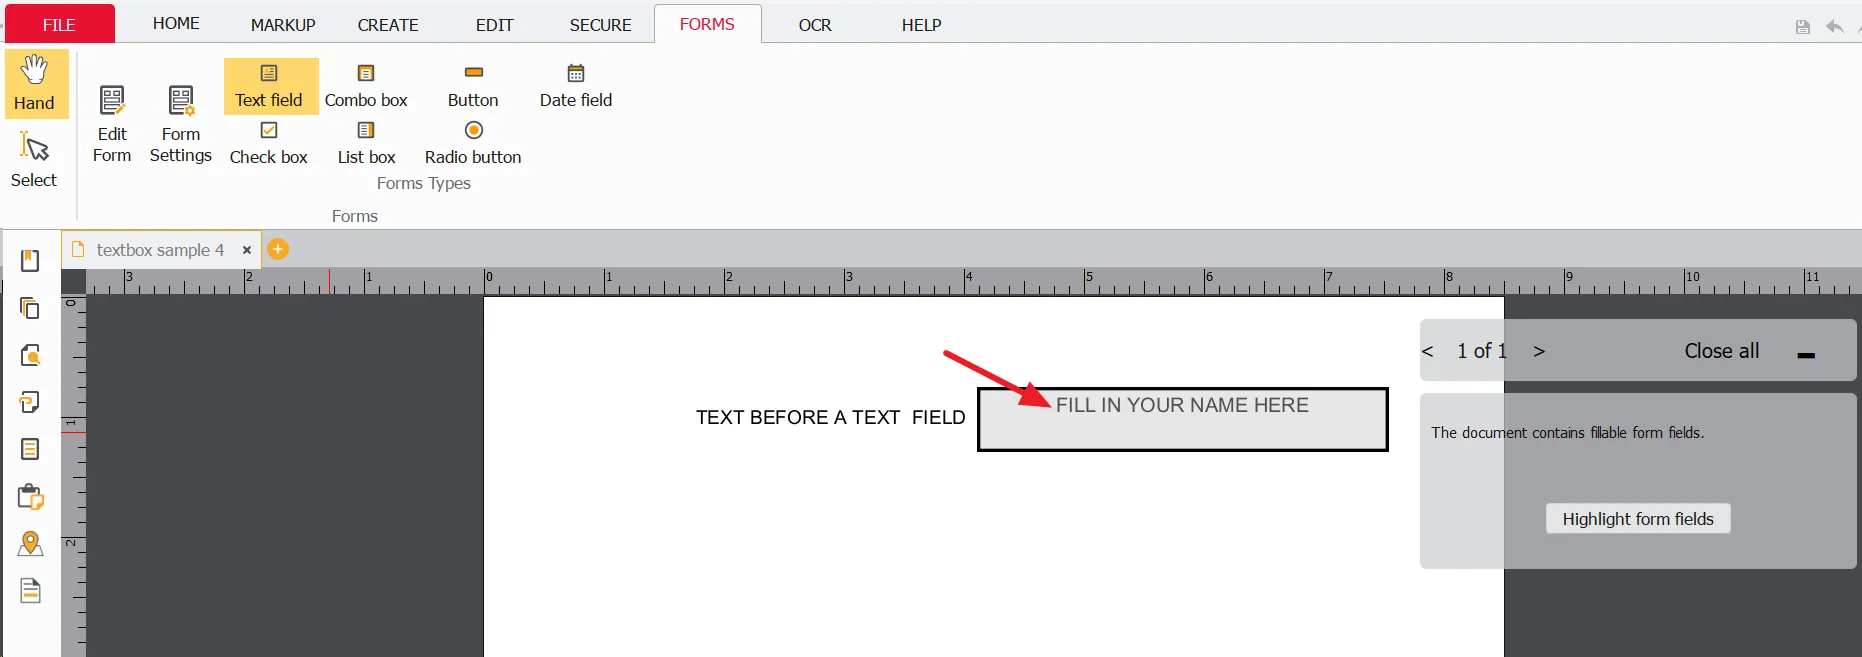
When you enter text in that field it will look like this:
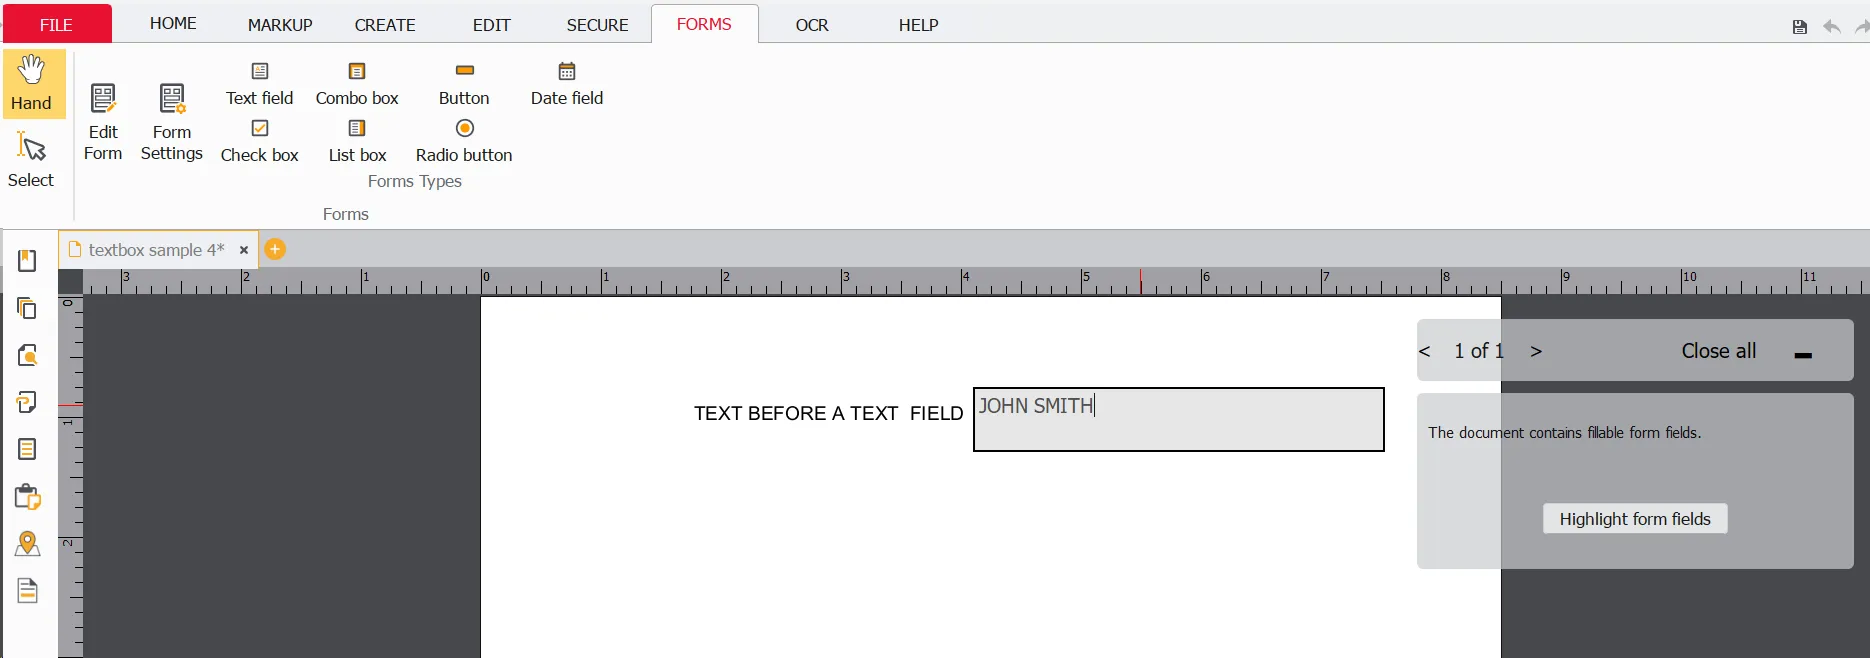
Same Field Names = Same Data Across Fields
To duplicate data in different fields, the fields must have the same name.
All fields with the same name will automatically update to display the same value.

The CHECK BOX
Open FORMS Tab
To create a new form element, click on the form function you want to use. For this example we will use the Check Box.
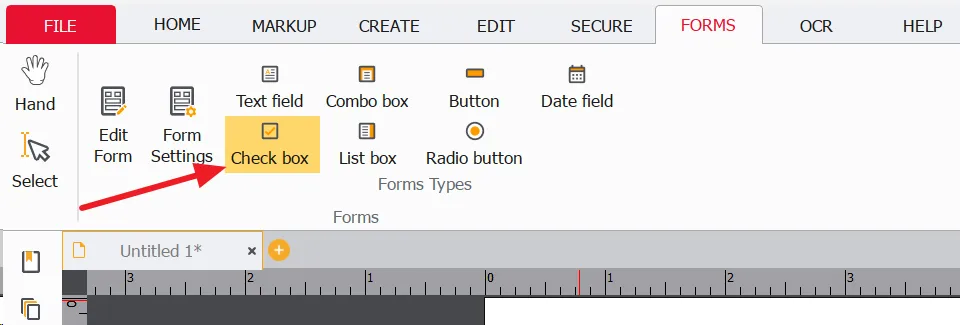
Click and drag to place the Check Box where you want it in the PDF document.

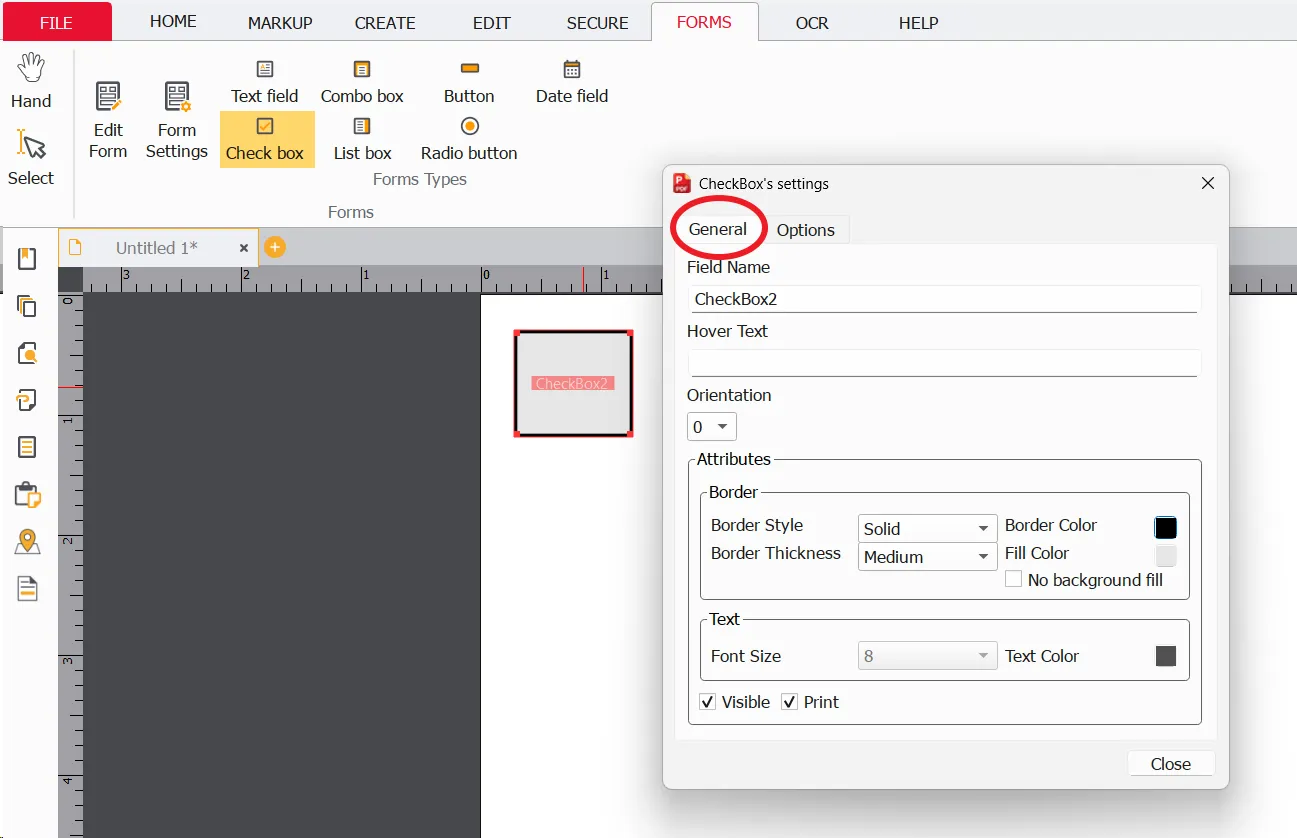
Double-clicking on the field will allow you to see additional modifiable parameters/properties for that field. For the Check Box under the General Tab these include: Hover Text, Border Style, Thickness and Color, Font Size and Color, Fill Color, Field Visibility, and Field Printability.
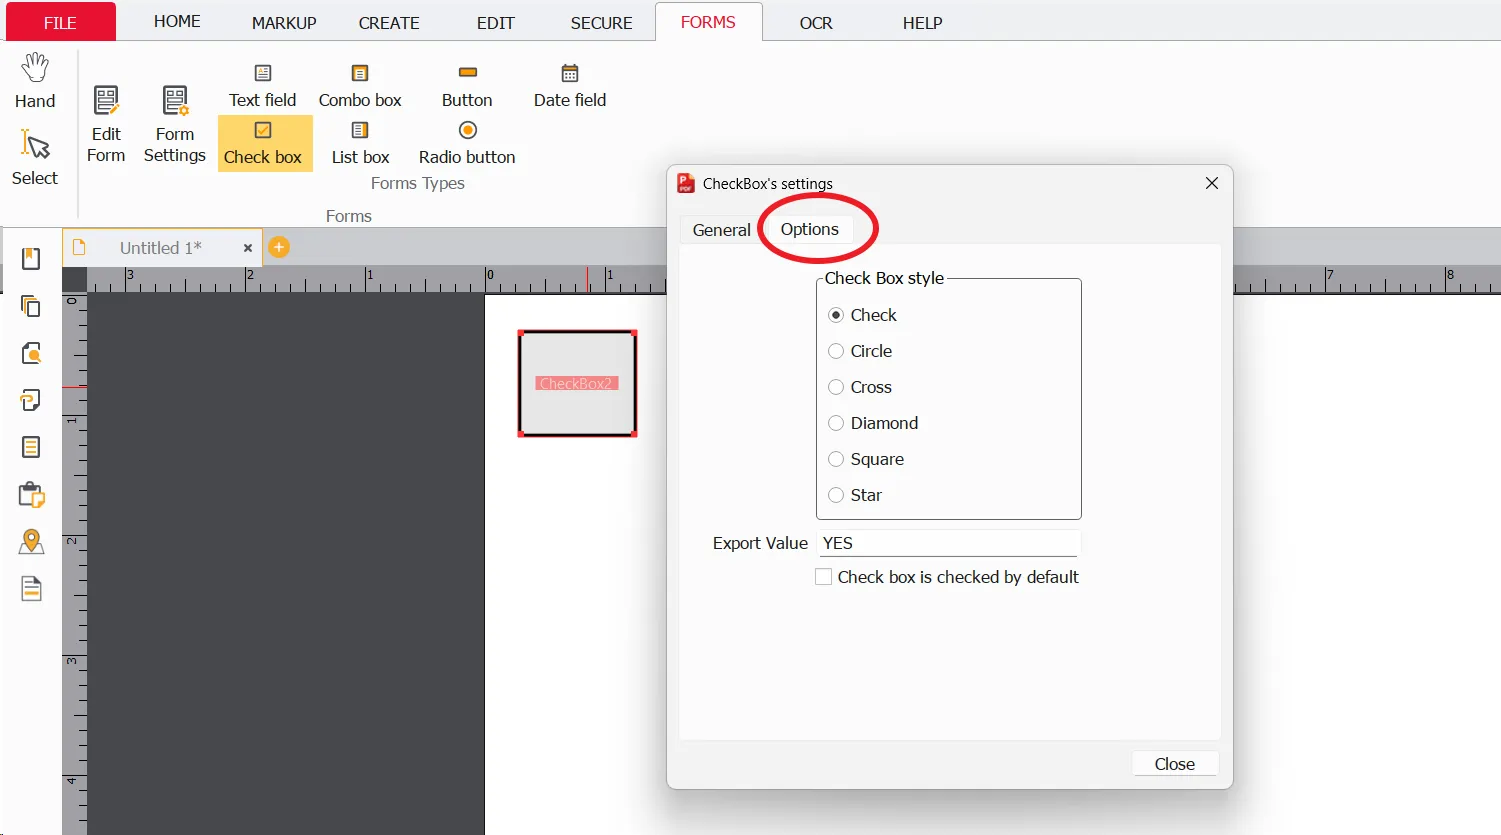
Under the second Tab, Options, the following parameters are available: Check Box Style, Export Value (editable) and whether the Check Box is checked by default.
Edit existing Form fields
Clicking the Edit Form button will instantly highlight all form fields on the PDF, making it easy to move and organize them.
To edit a Field Name, simply select it. The field will change color, indicating that it is now editable (as shown below).
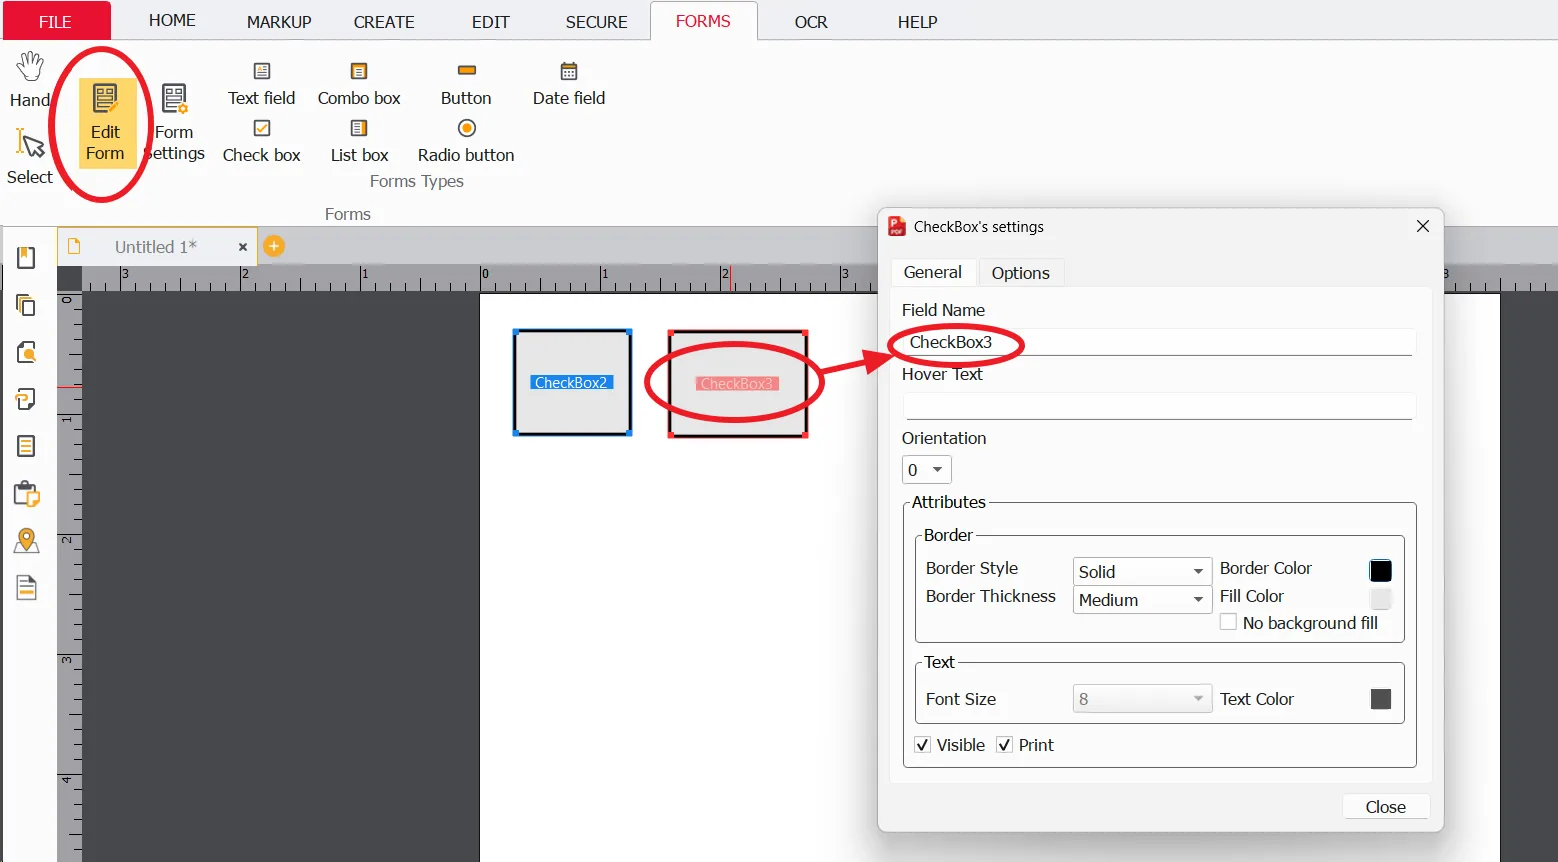
The CheckBox settings can now be configured as needed. Available options include: Border Style, Border Color, Border Thickness, and Fill Color. You can also adjust the text font size and color.
Form fields - Copy, Paste, Duplicate, Delete
While using Edit Form, you can quickly manage form fields by right-clicking on any field. A context menu will appear with the following options: Copy – Copies the selected form field or multiple fields to the clipboard. Paste – Inserts the copied form field or multiple fields onto the current page. Duplicate – Creates an identical copy of the selected form field. Delete – Permanently removes the selected form field from the PDF. These options provide a quick and convenient way to create, reuse, or remove form fields while designing or editing interactive PDF forms.
Javascript Settings
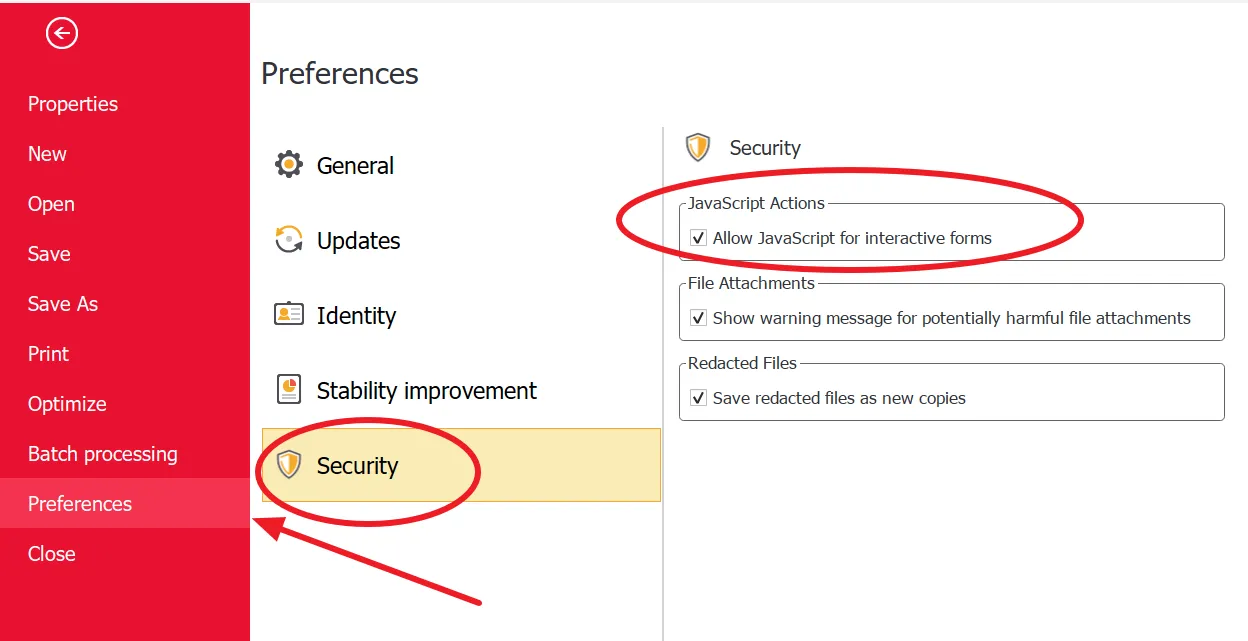
PDF Pro now allows JavaScript to run in interactive PDF forms, enabling advanced form functionality such as calculations, validation, and dynamic fields.
The software does not create JavaScript functionality itself; it only allows existing scripts in forms to run.
JavaScript is disabled by default for security reasons. While many forms use JavaScript for calculations and other helpful features, some documents may contain unsafe scripts. Users can choose whether to enable JavaScript when opening a document.
Preferences setting
This option is enabled by default, but you can disable it by going to
Preferences > Security and unchecking the JavaScript setting.
Pop up screen option
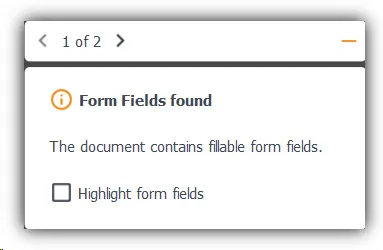
If Javascript is disabled under the Preferences screen (check box is blank), when you open a PDF form that contains JavaScript, a two-page notification will be displayed. (If it is enabled, then you will only get the first notification.)
The first pop-up page advises that the document contains fillable form fields. You can choose to have the fields highlighted, making them easier to identify and complete.
Page 1 of 2 – Fillable Form Fields
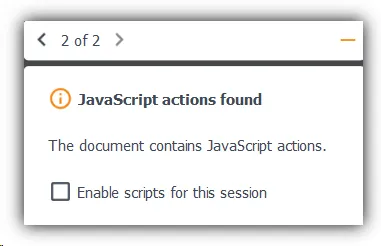
Click the arrow to display the second page of the notification. This page alerts you that the document contains JavaScript actions.
Page 2 of 2 – JavaScript actions found If JavaScript is disabled in your PDF Pro preferences, you can choose to Enable Scripts for the current session only. This allows the document's JavaScript actions to run while the file is open without changing your default JavaScript security settings.
Note: Some PDF forms may contain advanced JavaScript functions created in other PDF applications. For example, a form may include automated calculations, validation rules, or custom actions that rely on specific JavaScript features. While PDF Pro supports many JavaScript functions, some advanced scripts may not be fully supported and may not function as expected.
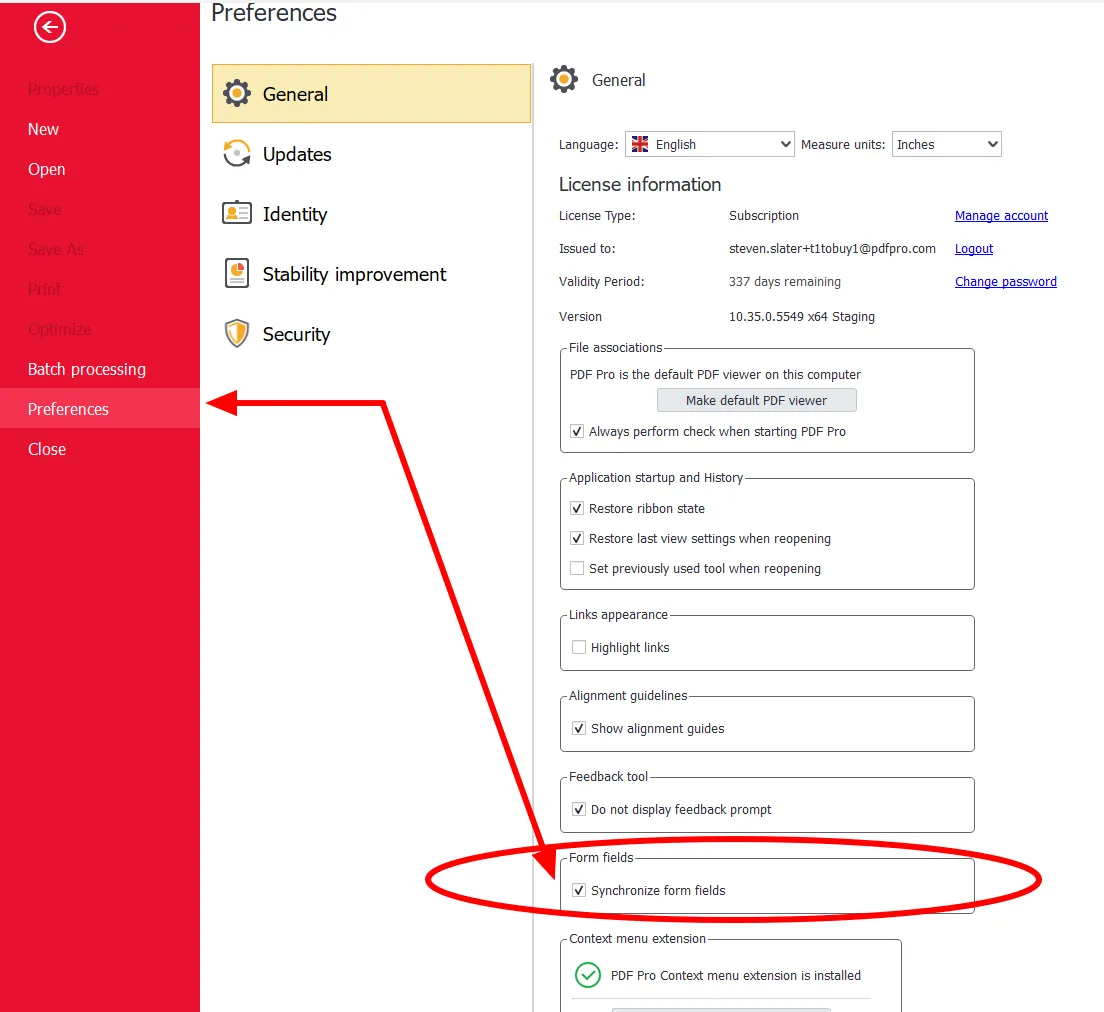
Synchronize Form Fields
Some PDF forms contain JavaScript-enabled fields that are designed to synchronize with one another. This means that when information is entered into one field, the same information may automatically appear in other related fields. This helps reduce repetitive manual data entry and ensures consistency across the form.
In some forms, selecting or editing one field may cause all related fields to become selected or updated at the same time. If you do not want this behavior, you can disable field synchronization in PDF Pro.
To turn this option on or off:
- Open Preferences
- Find Form Fields
- Check or uncheck Synchronize Form Fields
When this setting is disabled, fields will no longer automatically synchronize with other matching fields in the PDF form.